If you're working in the digital product design world, you'll definitely know that Figma is the designer's tool of choice. I have been working in it for almost three years. Wow, time flies. The Figma team is always adding new features, so it's important to stay current in one's practice.
As part of my professional growth this year, I opted to enroll in an advanced Figma course called Figma Academy. Developed by Figma superuser Michael Ridd, it covers a wide band of topics for user experience designers from proper file setup to design systems to responsive design to developer handoff and more. There are many ways to use Figma (it's flexible like many design tools) but it's great to level set my methods against those of someone who knows the intended best flow of use for the tool. And Ridd is that.
The Learning Experience
Ridd includes videos alongside a set of Figma files to complement the student's learning in several ways. As an educator myself, I know that people like to learn in different ways. I personally liked watching the videos (especially within a player that allows for faster playback speeds) and then recapping by looking at the slides inside the accompanying files. No matter how you choose to learn, there are great exercises at the end of each section to test your learnings.

If that wasn't enough, the sheer collaborative nature of Figma itself allowed me to interact directly with Ridd and the other students currently going through the material. Figma allows you to see the name, cursor and profile photo of everyone else currently viewing the file you're in, as well as any comments they've left on any material. It felt like I was in a virtual classroom of a totally new kind.

I even left a few questions for Ridd, which he answered a few days later. Though the course is self-directed and has been released for about a year, I felt like I was getting a live sort of experience just the same as if it had been set at a specific time for all students to complete.
Well, you may be asking, what the heck did I learn? Overall I learned that Figma is agile, just like the environment I work in, in that it is constantly changing and updating. Especially regarding component creation, the best way to do this has changed several times since I started using Figma in early 2020.
A Little About Components
Components, or symbols, are a handy shortcut to use while creating visual screens of content. If you are using the same style of button or text field all over your interface design, you'll want to create a parent version (component) of these elements to copy from for all your future uses. This will ensure all the instances look the same, and what's even better is that any changes made in future to this parent version will automatically change all the instances to match. Example time! Say I start with a blue button component, use it in a bunch of different screens, and then decide I want all those buttons to be green instead. I don't have to individually change all the buttons, I can just change the button component to be green and all the instances will snap from blue to green immediately. It's absolutely magic compared to how I used to do things in Photoshop back in the day.
"With great power, comes great responsibility" - Uncle Ben
Looking back on Vena's design system, which I founded in 2019 as an internal company hackathon project, I am amazed at how many people rely on it today in 2022. I had been hoping to use some of the skills I gained from this course to make improvements to the system, and some I surely will do, but some of the current methods for component building seem to be in flux.
Bubble Properties
I hear a lot of designers excitedly discussing Bubble Properties, which are a yet-unreleased feature that were first discussed in Figma's user conference in May of this year. Their purpose is to make one's components more flexible with fewer layers and less time spent setting up the component at the start. Ridd talks about these several times in the training and muses over how their introduction will change the component building process, but frustratingly I cannot find any information on Figma's website about when they will be released. This leads me to feel I should wait for this feature before any big decisions are made regarding the structure of our components, even though I want to update them and simplify them to the level that I can today. The bigger a project gets, the more people start using it (hopefully), then the riskier it is to make changes to current methods and content.
Typographic Rhythm
I already knew a lot about typography styles and building out typography to be used in a design system, but I had never heard of typographic rhythm before. Beyond your usual type selections of headings, paragraph text, captions and other styles, Ridd suggests that each style be 1.33x (for web) or 1.2x (for mobile) the size below it, then round to nearest 4 to fit on the grid. These small details are what go together to ensure a page feels well-designed. They may not be immediately noticeable, but great design is surely found within the subtle details that are perceived just below consciousness. In other words, it's what makes us look at a well-designed page and feel a sense of calm over our brains. Oh, is that just me?

How to make colour schemes
I can't believe I learned something new about colour, I really thought I had learned all there was to know. To create a series of harmonized colours, first go into HSB mode, not HSL or HEX. Then, change the hue to whatever you like while limiting the values of saturation and brightness from moving more than 10 pts. So in other words, any hues with similar saturation and brightness will look good together. Then to create a lighter and darker compliment to each colour, you simply keep the hue the exact same (duh), lower the saturation to between 5-10 for the pale colour, and set the brightness to 50 for the darker colour. I love this trick and I had never heard of it before! Very exciting for me.

Prototyping with Switchboards
I love the robust features found in Figma's Prototyping. Anything I can do to make my prototypes look as real as possible will improve the accuracy of my usability test results. It will also improve the handoff process for developers, who can reference the prototype to understand how to code my designs into real life. Sometimes though, that creates something we call “noodle soup” when viewing a project file. All the noodles are connections between screens, and it becomes too messy to handle quite quickly when you are working with 10+ screens.
.png)
Ridd suggests something called switchboards, which uses the component principle we talked about above, to reduce the number of noodles required. Take the example of a website's navigation top bar which exists on every screen with the same behaviour. Facebook's blue bar across the top of the screen is a good example of this pattern. If you're going to be linking to an "About" page from the navigation on every page, please don't try to link to your "About" screen from every other screen (countless noodles!). Instead, create a component for your top bar and link from that to your "About" screen. Now, you guessed it, using that top bar component on every screen will bring along the connections to every instance. One blue noodle replaces many, cleans up your screen, and is easy to edit in one place if you decide to link your "About" to another screen down the road.

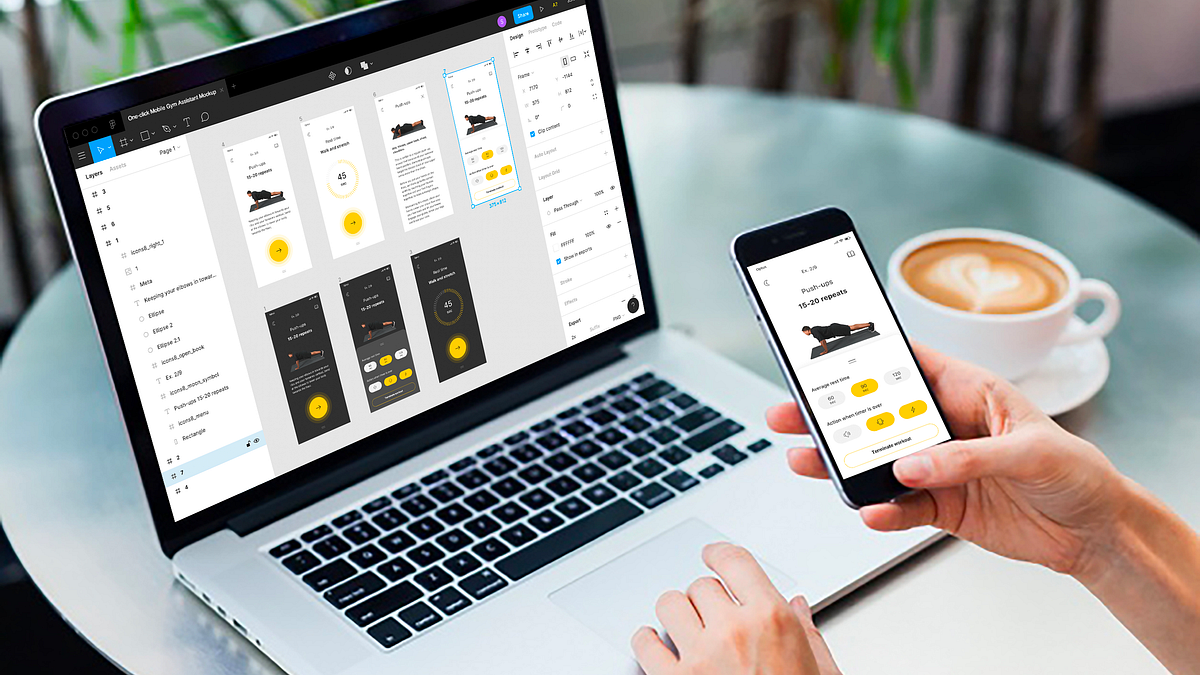
Figma Mirror
Okay, I already knew about this one but I don't think I have ever used it in Figma. I had used the same feature in Sketch, and Ridd reminded me topically that this is the best way to design for mobile screens. Mirror allows you to design mobile interface screens on your desktop or laptop screen, while updating them in real time on your phone. I would suggest opening Figma Mirror on your phone to reference constantly with each design change you make, so you can be confident that your designs will work "in-situ". Because this feature works so seamlessly fast, I could feasibly be designing with the keyboard of my computer while staring directly at my phone screen, as if it were an extra monitor. It's really wonderful.
I really enjoyed the content and the format of Figma Academy. If you are an advanced Figma user, I guarantee you will learn something new. And if you're just starting your Figma journey, Ridd offers a slightly longer introduction to start at the basics, so you're covered as well.
Happy designing!
No comments:
Post a Comment
Note: Only a member of this blog may post a comment.